AI Clothes Changer — Put Any Outfit On Your Photo
Sign in with Google to get 3 free try-ons.
How to change clothes in a photo
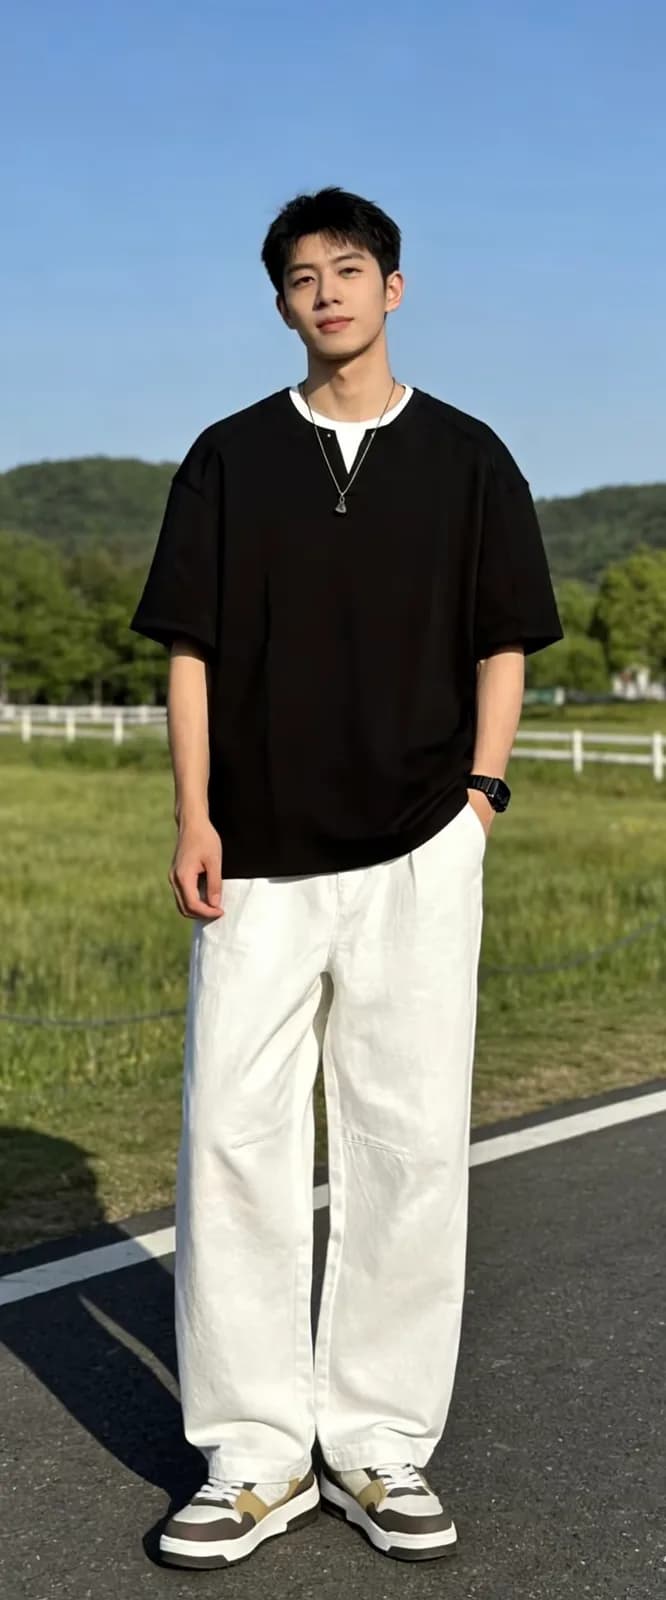
1. Upload your photo
Use a clear photo of one person with the face visible, at least 700px on the shortest side. Half-body is fine for tops, but pants, skirts and dresses need a full-body photo so the whole garment fits. Group shots, a face hidden behind a phone, and small thumbnails are rejected before you spend anything.
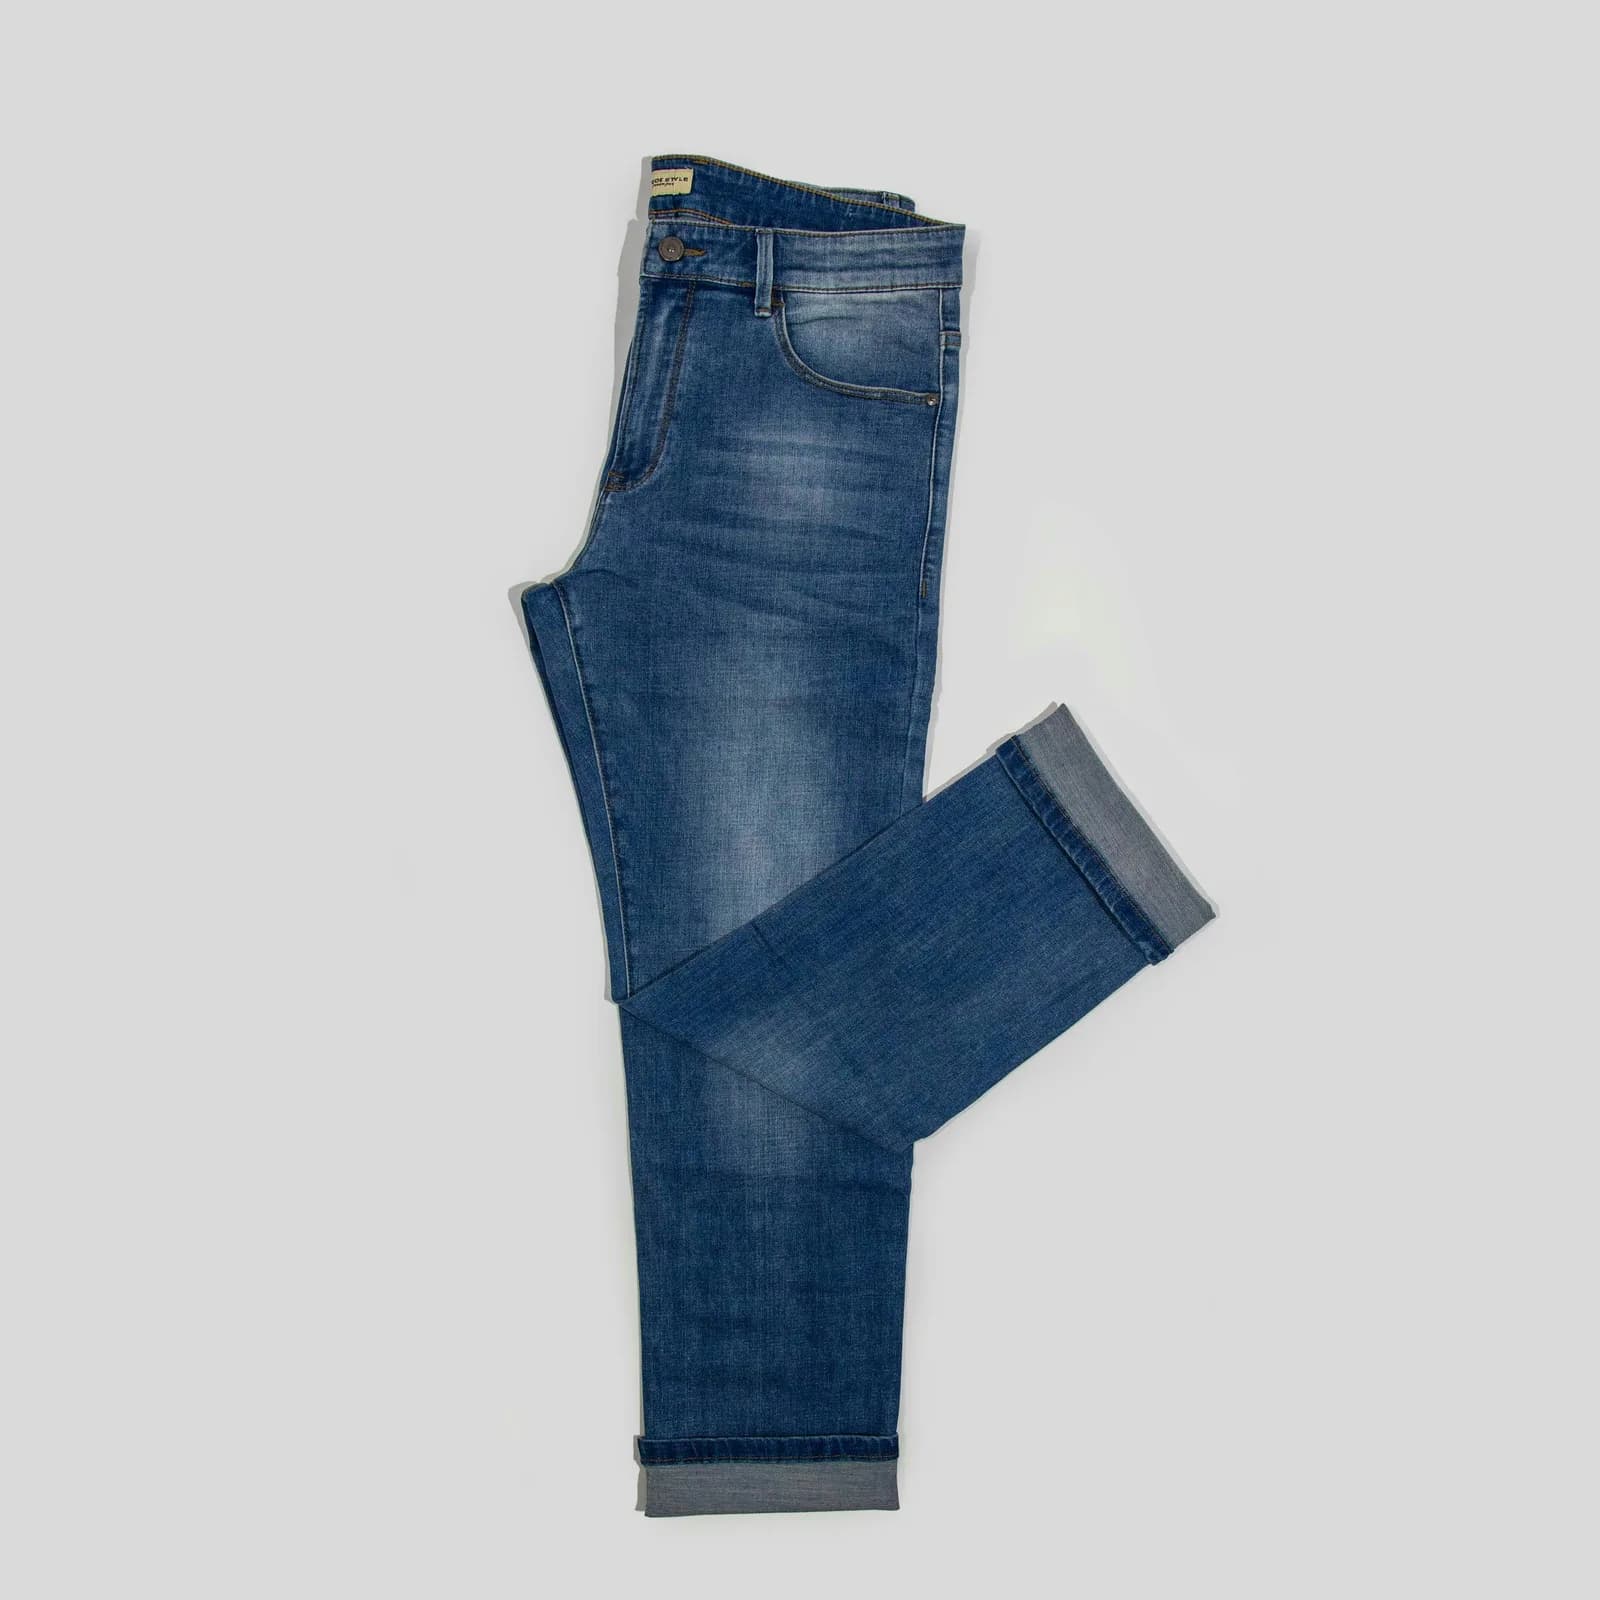
2. Add the outfit
Upload a photo of the clothes: laid flat, on a hanger, or worn by someone else, at least 500px on the shortest side. Make sure the whole garment is in the frame, because a cut-off hem or sleeve stays cut off. If someone is wearing it, only the clothes are used, never their face, hair or bag.
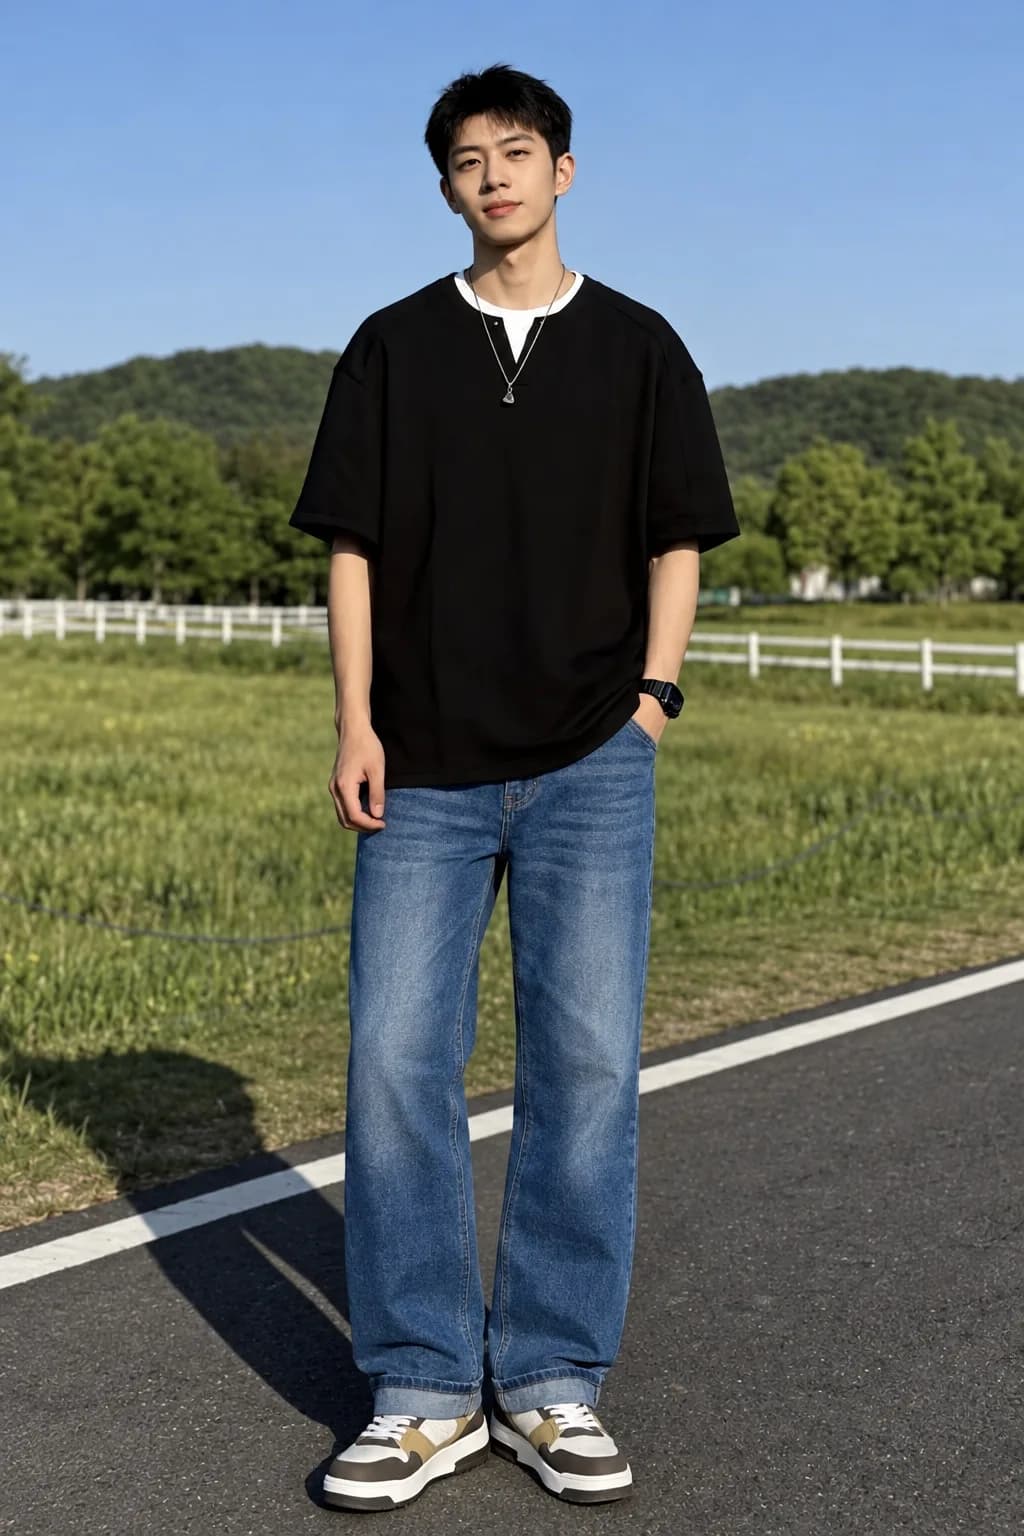
3. Generate
Press Generate and in about 45 seconds you see yourself in the outfit: a virtual try-on on your own photo, not on a model. Every result is saved in your History, so you can close the page and come back later. The first 3 try-ons are free; after that it's one credit per image (see pricing). One AI clothes changer, one clothes swap — no editing skills needed.
What changes and what stays the same
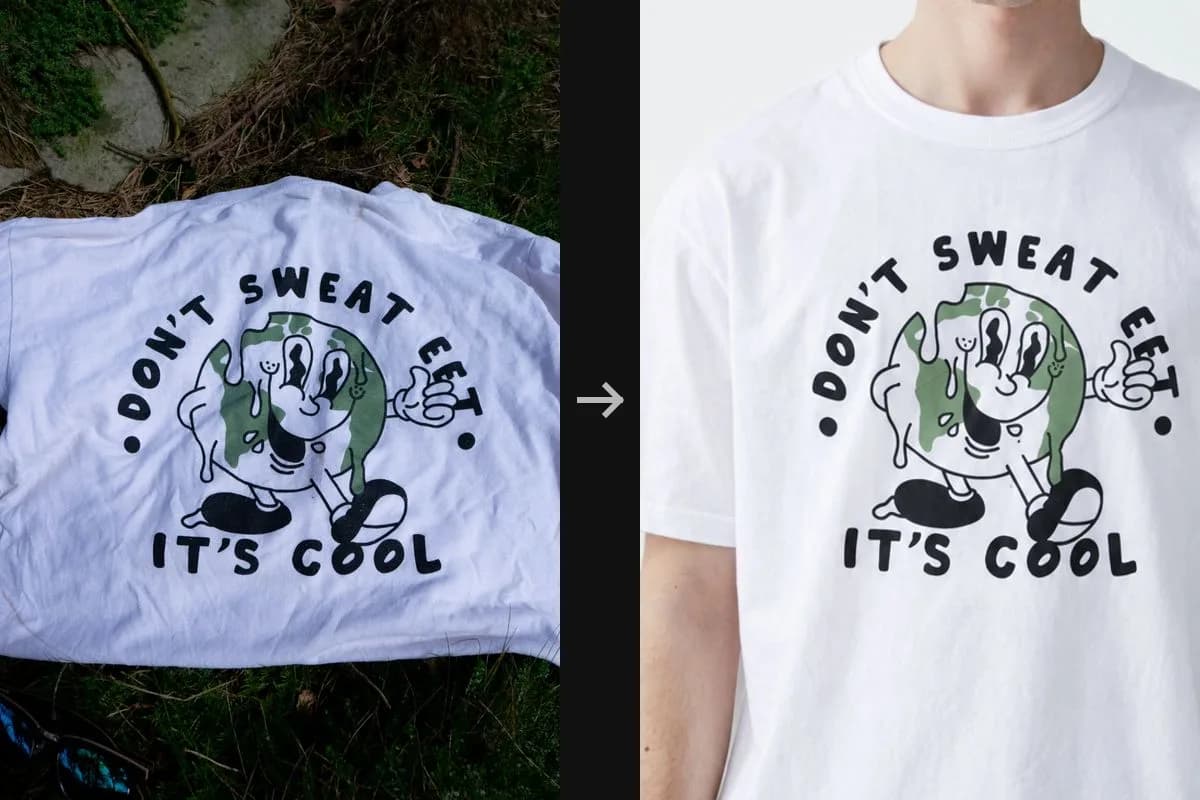
Logos and printed text stay correct
Small logos, brand names and print on the garment come out as they are in your outfit photo — not redrawn as gibberish.
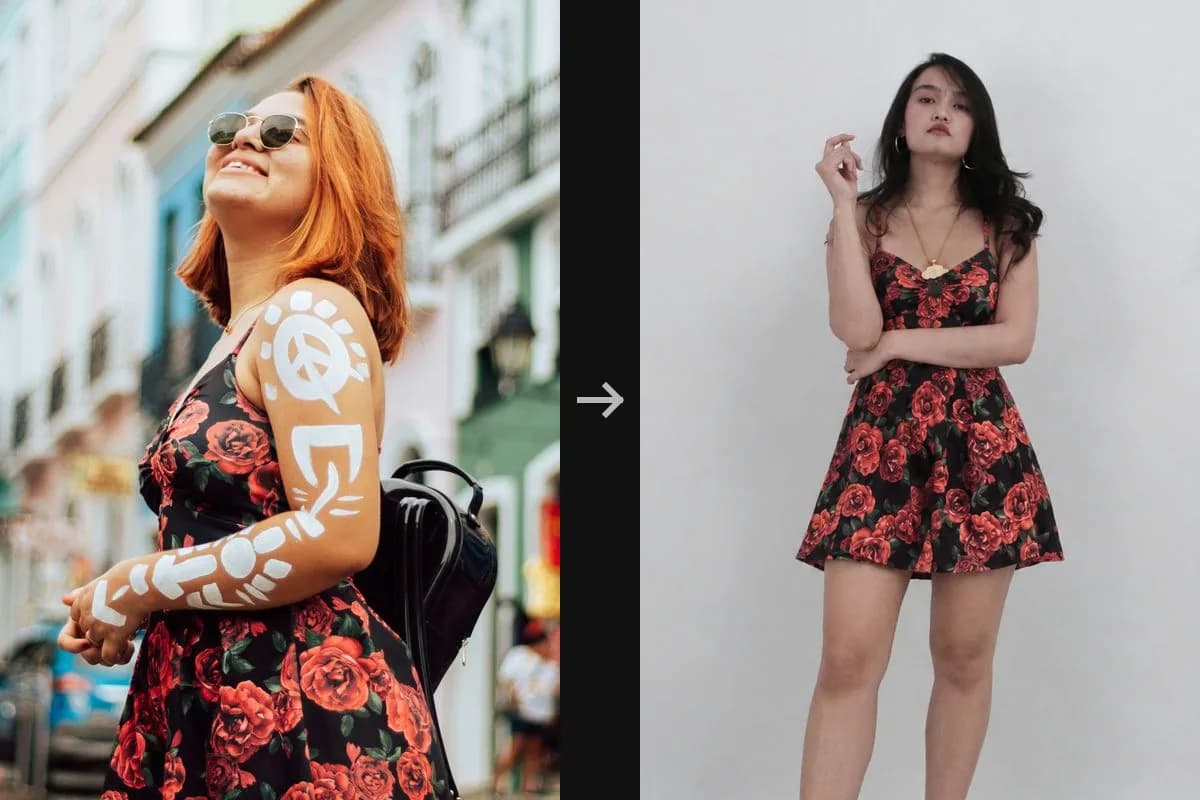
Only the outfit, not the person
Your face, hair, body and whatever you were already wearing stay exactly as you uploaded them. The person in the outfit photo never appears.
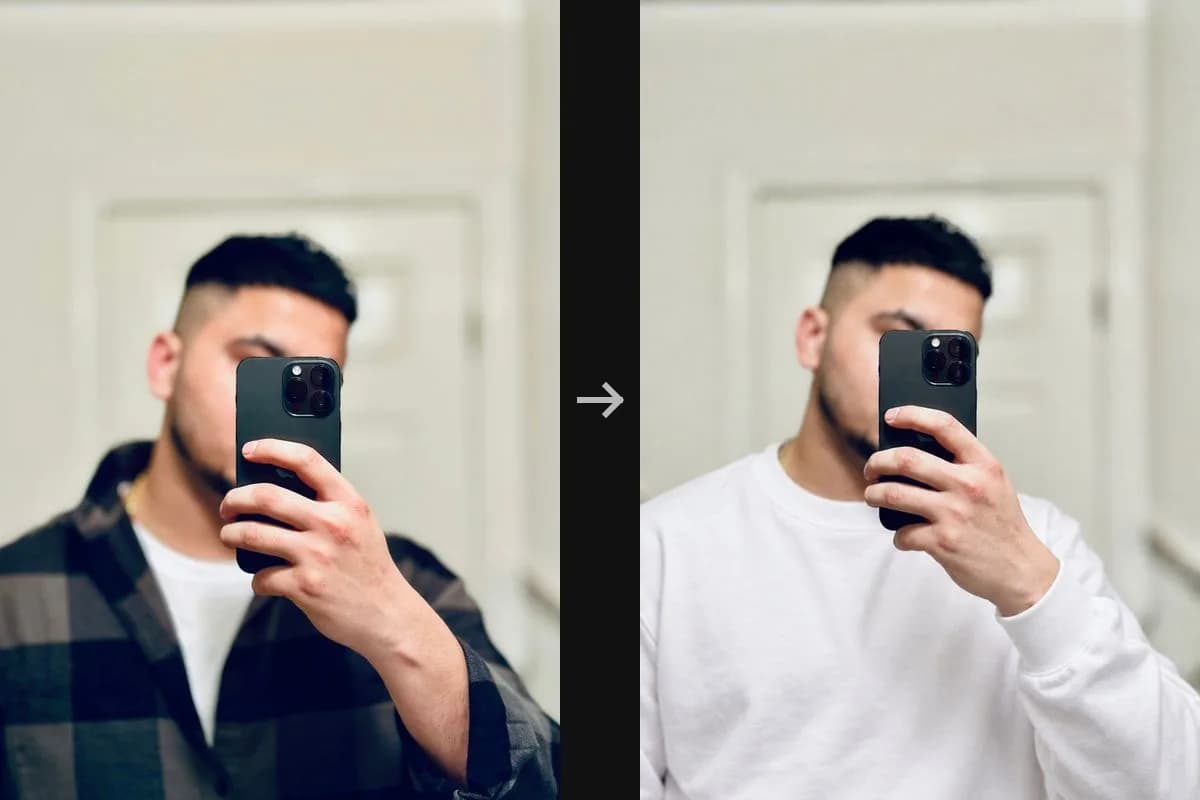
It never invents what you didn't upload
If your face is covered or the garment is cropped, the result stays covered or cropped. We don't guess.
Which clothes work with the AI clothes changer
Tops, bottoms, dresses and suits all work. Every outfit swap needs the same two photos; what changes from one garment to the next is how much of you the photo should show, and how to shoot the clothes.
Tops
T-shirts, shirts, sweaters, hoodies and jackets. A flat-lay or a hanger shot is the safest choice, because the whole garment is in view and nothing covers the print. A half-body photo of you is enough. Logos and printed text usually come out right, but tiny text inside a very dense all-over pattern can blur.
Pants and jeans
Jeans, trousers, shorts and joggers. Use a full-body photo of you standing, with your legs and feet in the frame; a half-body photo won't work, because the AI doesn't add legs that aren't there. Lay the pants flat with both legs straight, or hang them so the full length shows. A folded pair hides the hem, and the AI won't guess what it looks like.
Dresses and skirts
Mini, midi and maxi dresses, and skirts of any length. Like pants, they need a full-body photo. A hanger shot is the easiest way to show a long dress from neckline to hem. A photo of someone wearing it works too: you get the dress, not their face, hair or bag. For long styles, check that the whole hem is in the outfit photo.
Formal wear and suits
Blazers, suit jackets, dress shirts and full suits. A blazer or a shirt on its own counts as a top, so a half-body photo is fine. A full suit, jacket and trousers together, needs a full-body photo. Shop photos are a good source, since suits are usually shown whole, on a hanger or on a model. Skip close-ups of a lapel or a cuff: the AI needs to see the whole garment.
Try on clothes for men and for women
The AI outfit changer works the same way for menswear and womenswear. There's no setting to choose: upload your photo and the clothes, and it puts them on you. Your body, pose and background stay as they are.
Check a shirt, a blazer or a pair of jeans before you order online. See whether a suit color works for a wedding. Try a party dress, or a skirt with the top you're already wearing in your photo. Try two options for the same event and compare them in your History.
Where the outfit photo comes from doesn't matter for a virtual try-on. A product photo from a shop, a picture of something in your closet, or a photo of a friend or a stranger wearing it all work. If someone is wearing it, only the garment ends up on you.
How to take the photo
When you change clothes in a photo, the AI keeps your face, pose and background exactly as you uploaded them. So your own photo sets the limit for how good the result can look. A few minutes spent on it pays off.
- Good light. Face a window or stand outside in daylight. Strong light from behind turns you into a silhouette and can hide your face, which fails the face check.
- Face the camera. Stand straight on with your arms relaxed by your sides. Your face needs to be clearly visible, and crossed arms hide the part of you the clothes go on.
- Half-body or full-body. From the waist up is enough for tops and jackets. For pants, skirts and dresses, step back until your feet are in the frame.
- Only you in the frame. A photo with more than one person is rejected. Crop out friends, or pick a shot where you're on your own.
- No heavy filters. Beauty filters and strong color effects stay in the result, because your face and background aren't changed. A plain camera photo looks the most like you.
Your photo needs at least 700px on its shortest side. Most phone photos are well above that; a cropped screenshot may not be.
When it won't work well
This virtual try-on works only from what's in your two photos. There are three cases where results fall short, and each one has a simple fix. If a generation fails outright, you aren't charged; here's how credits work.
A covered face stays covered
If a phone, a hand or hair covers part of your face, the AI won't draw the missing part back in. The result keeps it covered. In a mirror selfie, hold the phone lower and to the side, or ask someone to take the photo for you.
A half-body photo won't grow legs
Pants, a skirt or a dress on a half-body photo won't add the legs that aren't in the picture. The result stops where your photo stops. Use a full-body photo instead, standing, with your feet in the frame.
Tiny text on dense patterns can blur
Logos and printed words usually come out right. Very small lettering inside a busy all-over pattern sometimes comes out soft or smudged. Upload a sharp flat-lay of the garment, shot close, so the print is as large and clear as possible.
AI outfit changer or AI clothes changer — same tool
Some people call it an AI outfit changer, others an AI clothes changer. It's the same tool: one photo of you, one photo of the clothes, and back comes a picture of you wearing them.
It doesn't change your face, hair or body, and it doesn't copy the person from the outfit photo. It swaps the outfit and nothing else, which is why the result still looks like you.
FAQ
Is the AI clothes changer free?
The AI clothes changer is free to try: every new account gets 3 free try-ons. Free results carry a small watermark and are one size smaller. After that you buy credits: 60 for $15, 130 for $30 or 300 for $65. One credit is one image, with no subscription. See credit packs.
Do I need an account?
Yes, a quick Google sign-in. It's how we give you your free try-ons, keep track of your credits and save every result to your History. There's no form to fill in and no new password to remember: one click with the Google account you already have.
How long does it take?
About 45 seconds from the moment you press Generate. When many people are generating at once you may wait in a queue first, and the page shows how many are ahead of you. You can close the tab while it runs; the finished image waits in your History.
Why was my photo rejected?
Every photo is checked before generating, so you never spend a try-on on one that won't work. A photo is rejected when it shows more than one person, when your face is covered, or when it's too small: under 700px on the shortest side, or 500px for the outfit photo.
Does a failed generation use up a try-on?
No. You're only charged when you get an image. If a generation fails, it doesn't count against your free try-ons or your credits. You'll see a message saying so, and you can press Generate again right away with nothing lost.
Can I use a product photo or a screenshot?
Yes. Product photos from online shops work for an outfit swap, whether the garment is laid flat, on a hanger or worn by a model. Screenshots work too, as long as the shortest side is at least 500px. A small thumbnail usually isn't, so open the full-size image before you save it.
What file types and sizes can I upload?
JPG, PNG and WebP, up to 15MB each. Your photo needs at least 700px on its shortest side, the outfit photo at least 500px. iPhone HEIC photos aren't supported yet. Convert them to JPG first, or set the iPhone camera to Most Compatible so it saves JPGs.
Where are my results saved?
In your History, linked at the top of every page. Every finished image is saved there, so you can close the page while it generates and come back later. Paid results are full size; free results carry a watermark and are one size smaller.